Are you looking to replace the lock on your front door?
Greetings, and welcome to Locksmith London 24
Have you recently moved into a new apartment and want to ensure that you are the only person who has access to it? Maybe your lock is broken and you need a locksmith to replace it? Locksmith London 24 offers a team of highly skilled locksmiths in London who will be able to help you with your locksmith needs in no time! Our crew will be able to assist you no matter where you are in London, as we cover the entire city and surrounding areas. Give our helpful team a call on 020 4525 1247 if you want to know how much it costs to change locks.
When you move into a new home, have a new roommate, or have a burglary, you’ll need to change your door lock. It can also be a quick and simple technique to change the appearance of your door. If you don’t want to replace the complete set of knobs because you like them, you can simply rekey the lock with a kit labelled for its brand. If your knob lock is in good working order but your deadbolt has to be replaced, have no fear. It’s even easier to replace a deadbolt than it is to replace knobs.
Approach #1 – Replacing a Knob Lock
1 – On the inside of the door, remove the screws from the old lock.
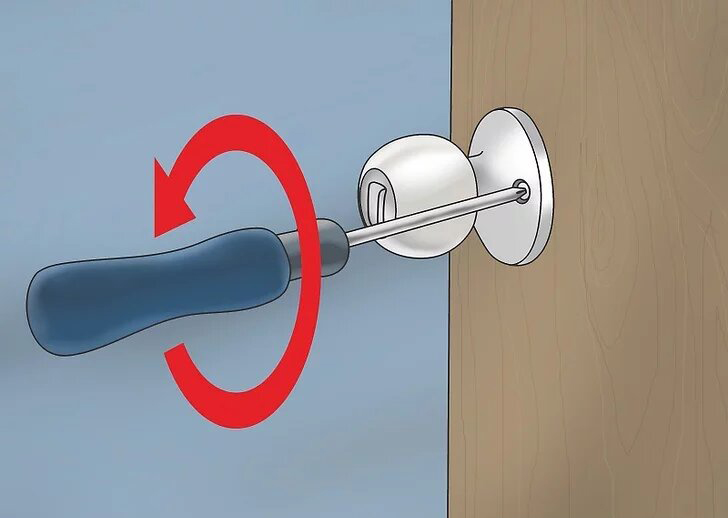
Remove the two or three screws on the inside knob plate with a Phillips head screwdriver. Then, by pulling each side’s door knob away from the door, remove it.
- A wire tool or a paper clip may also be required. Insert a paperclip into the little hole on the side of the doorknob if it doesn’t have any screws. This should free the knob latch, allowing you to remove the knob.
2 – Use a lock from the same manufacturer as your door.
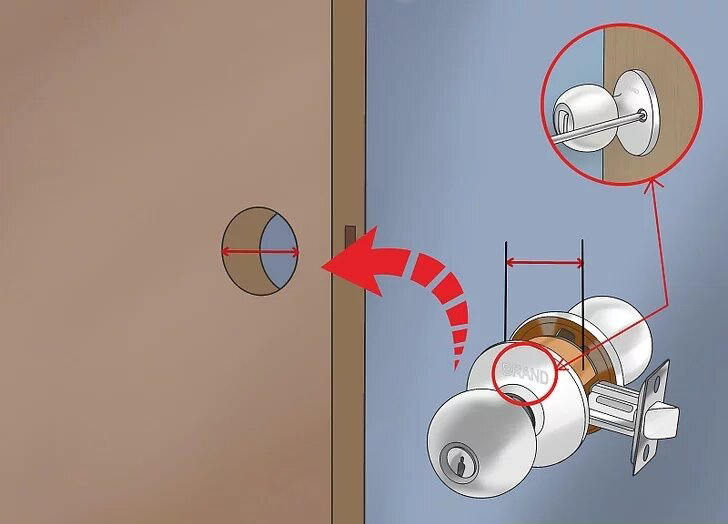
Measure the diameter of the lock’s hole and the distance from its centre to the edge of the door after removing the knobs. Check the brand of your current lock and buy one that matches it and fits the hole’s measurements.
- A home improvement store, locksmith, or online can help you discover a replacement lock that fits the measurements you took.
- If you buy the same brand, your new lock will match the rest of your locks, and you’ll be able to use the existing holes to install it.
3 – Remove the screws that hold the latch in place at the door’s edge.
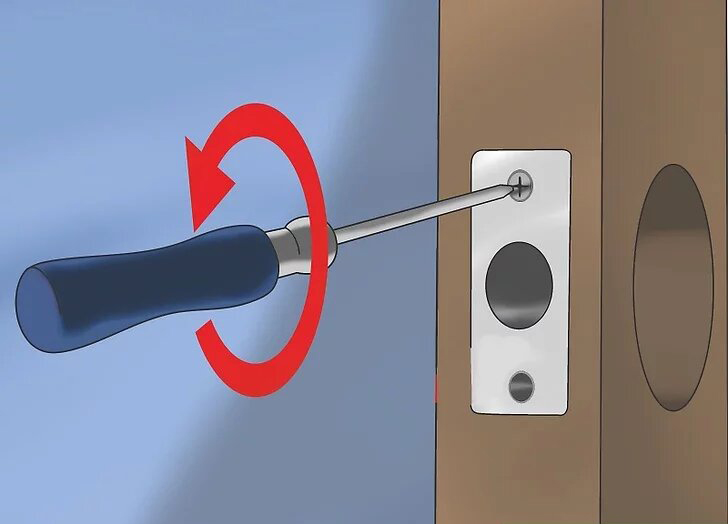
The latch is the last piece of lock hardware to be removed. The two screws that keep the latch plate in place must be removed. After you’ve removed the screws, you may slip the latch out of the door’s side aperture.
4 – The cardboard template should be wrapped around the door’s edge.
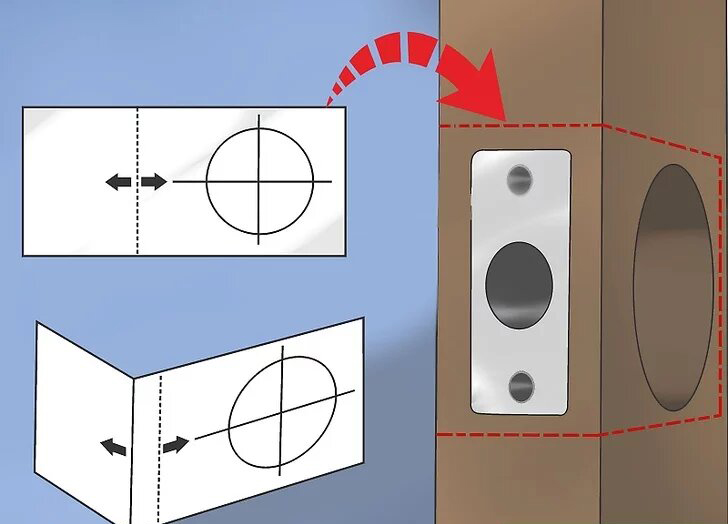
A store-bought lock will come with a cardboard template that shows you how the lock should be installed on the door. Make sure everything matches up by placing this template over the hole in your door. If the template does not perfectly match your hole, you have purchased the incorrect lock.
- If you purchased the incorrect lock, return the old lock to the hardware store and ask for assistance in choosing a lock that meets your needs.
5 – Replace the old latch with the new one.
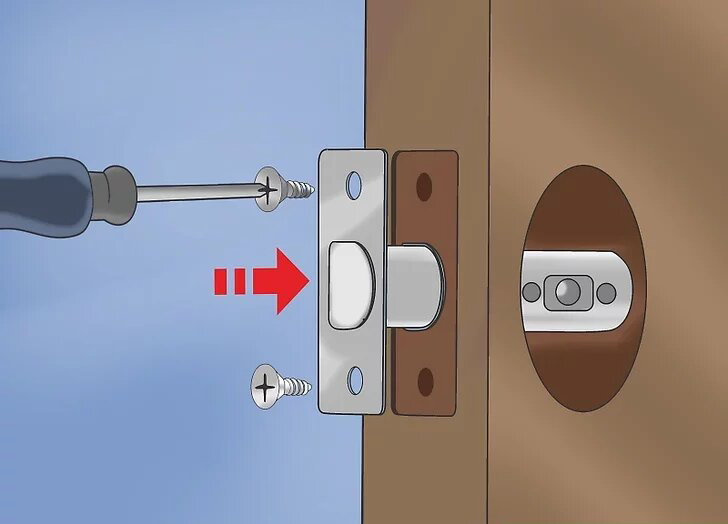
If your template is correct, begin installing the new latch by sliding it into the door’s edge opening. To secure the latch, drive new screws through the holes in the latch plate and into the door edge.
- It’s advisable not to reuse old screws because they’re likely to be older and weaker than new ones. If your new lock didn’t come with screws, purchase some that fit the lock and are the same colour as the rest of your hardware.
6 – Assemble the door lock.
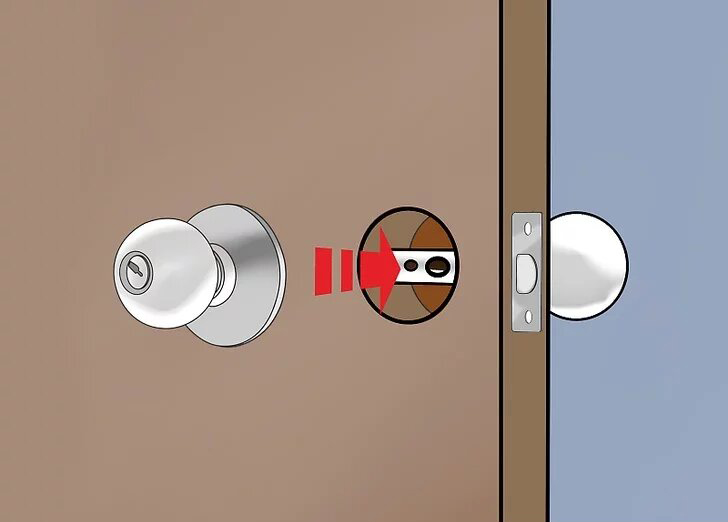
Place the outside (keyhole) and inner knobs on opposite sides of the lock, then slide them through the lock hole toward each other. They should meet and link in the middle. Allow them to slip together naturally rather than forcing them together.
- To finish putting the lock back together, drive screws into the holes on the inside door knob plate.
Approach #2 – Rekeying a Lock
1 – Purchase a kit that is labelled with the brand of your lock.
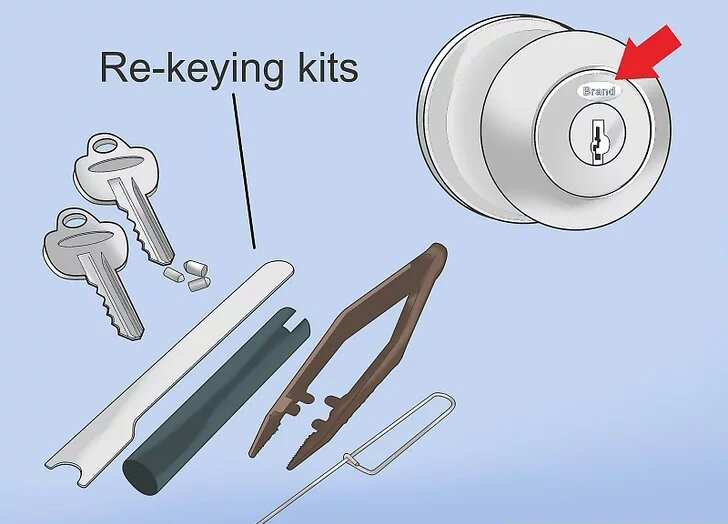
For most lock brands, re-keying kits with all the equipment you’ll need are available. A kit for one type of lock may not work for another, so check the brand of your lock and get a kit that matches it.
- Kits are available online as well as in hardware and home improvement stores.
- If there are any slight variances specific to your brand, read the directions in your kit carefully.
2 – Remove the doorknob from the outer door.
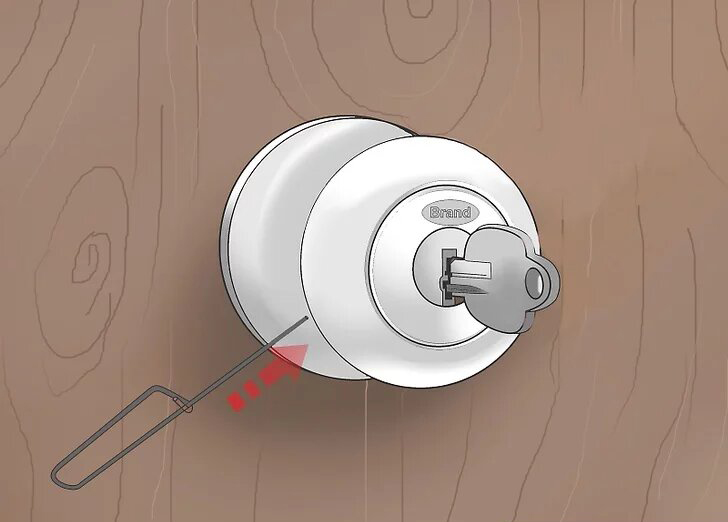
The package will come with a tiny, wire-like tool for removing the knobs. To open the door, insert your key into the lock and turn it. Insert the wire tool into the little hole on the inside door knob’s side. This will free the knobs, allowing you to remove the outside knob from the lock.
- Instead of the tool, you can use a stretched-out paperclip or pin. If you’ve misplaced your key, you’ll need to disassemble the lock and take it to a hardware store or locksmith to have a new key created.
- If your lock doesn’t have a side poke hole, you need to replace it entirely. Your lock is undoubtedly intricate enough that rekeying it will require the services of a locksmith.
3 – Remove the cylinder from the knob’s backside.
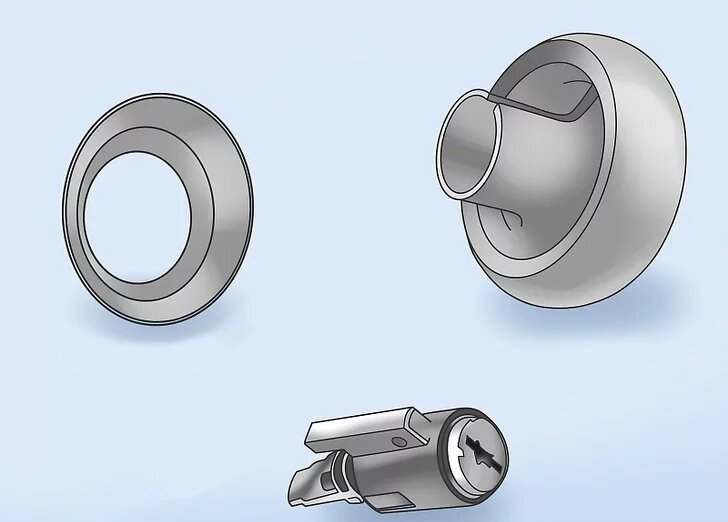
Look inside the knob for any sheets of plastic or metal that hold the lock cylinder in place after you’ve removed the outside lock face. If any are present, slide them out, then press down on the key, which is still inserted into the keyhole, to release the lock cylinder from the rear of the knob.
- If you notice rust or other signs of wear and tear inside the lock, it’s time to replace it.
4 – Remove the cylinder retainer ring.
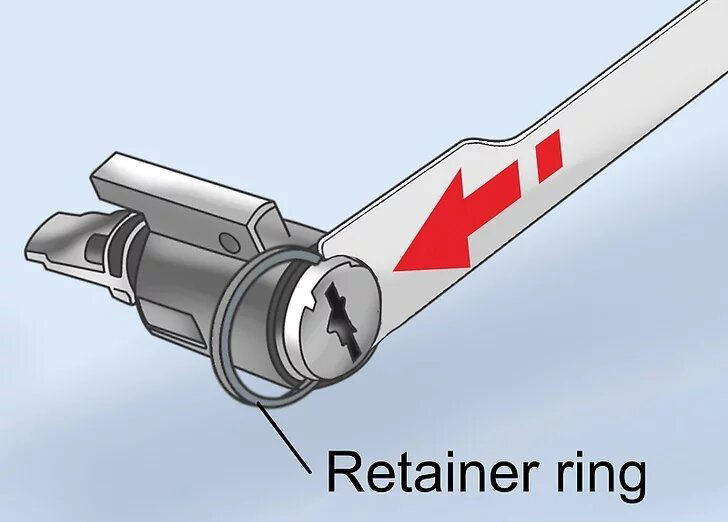
Your kit will come with a wrench-like tool that you’ll use to remove the retainer ring that secures the cylinder housing. Slide the tool around the horseshoe-shaped ring, then turn the tool to pop off the ring.
5 – Remove the cylinder plug from the cylinder housing by sliding it out.
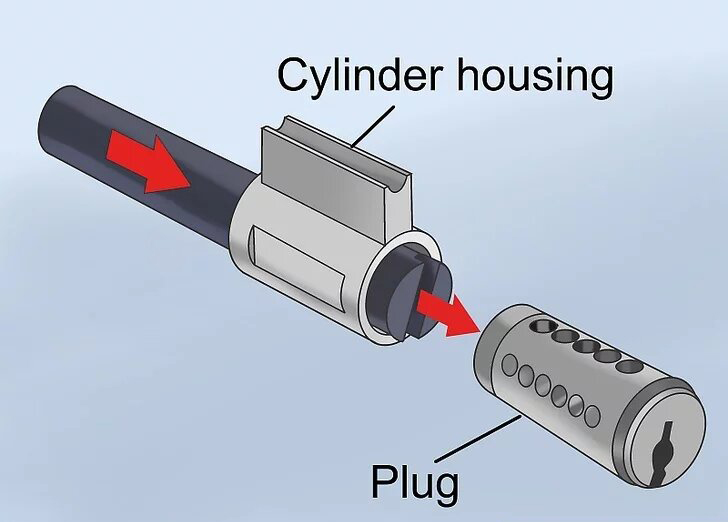
A cylinder follower, or tube-shaped tool, will be included in your kit to help you slide the plug out of the housing. To remove the plug, push it through the cylinder housing from the side opposite the keyhole.
- Keep steady pressure on the plug and follower as you slide the plug out, and make sure they’re always in touch, so the lock pins and springs don’t break out and fly around.
6 – The old pins in the cylinder plug must be removed.
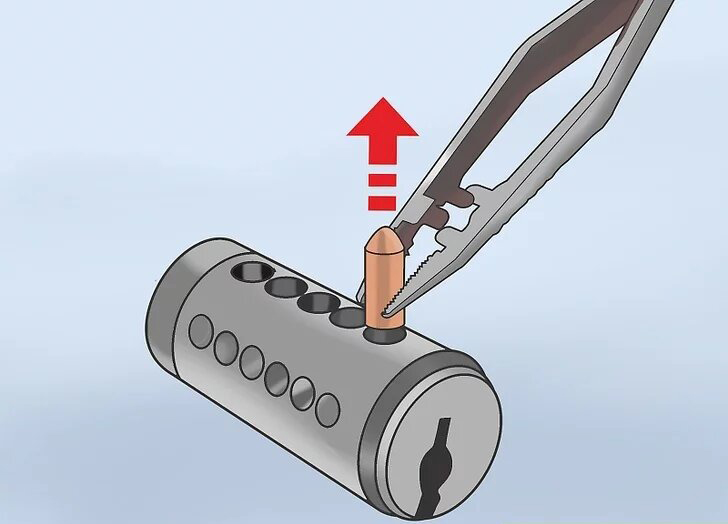
To empty the old pins from some locks, simply turn the plug over. Other locks may require you to use a pair of tiny tweezers included in the kit to pry them open. Check your kit’s instructions for specific information on how to remove the old pins from your plug.
7 – Replace the old pins with new ones that match the coding in the instructions.
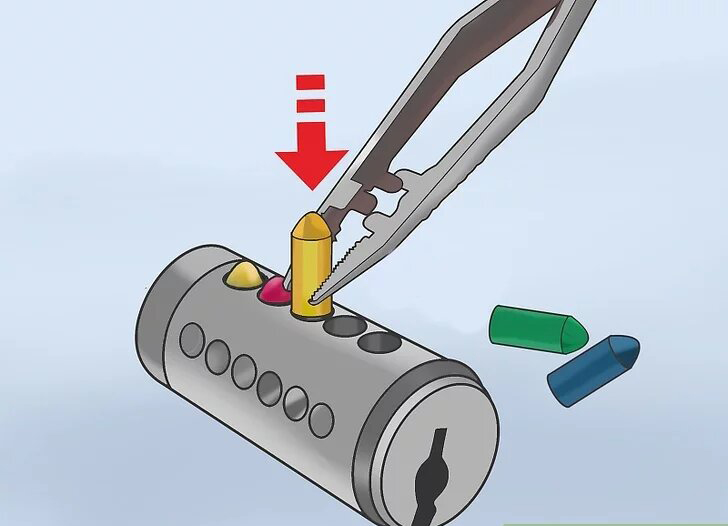
After removing the old lock pins, insert the new key (which comes with the kit) into the keyhole. The updated kit will include coloured or numbered pins, as well as a code in the instructions. To match the code, use the tweezers included in the kit to put the pins into the plug’s slots.
- For example, starting from the side opposite the keyhole, the code might indicate the correct order as blue, red, red, blue, yellow. Pins that have been properly inserted should be level with the surface of the plug and should not protrude beyond their slots.
8 – Put the lock back together.
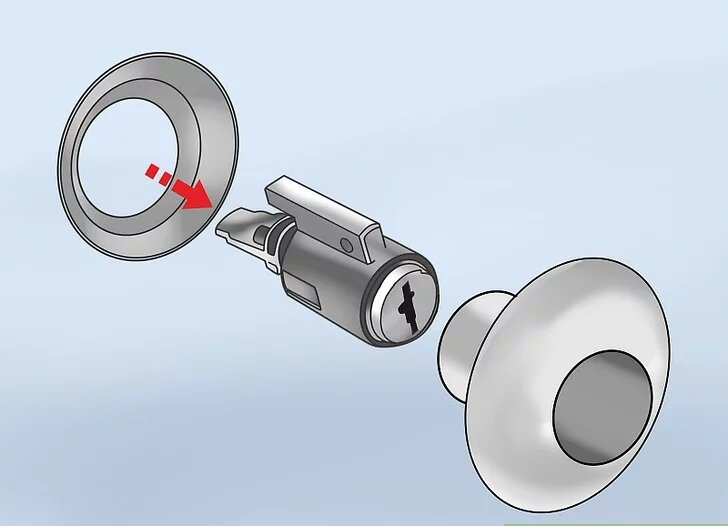
Push the plug back into the cylinder housing once the pins are in place. Replace any plastic or metal sheets that secured the cylinder by sliding the retainer ring back into position, popping the cylinder back into the door knob, and replacing any plastic or metal sheets that secured the cylinder. Rotate the key until the knob pops and locks into place, then push the external door back into its slot in the lock.
Approach #3 – Changing a Deadbolt
1 – Remove the old faceplates from the deadbolts.
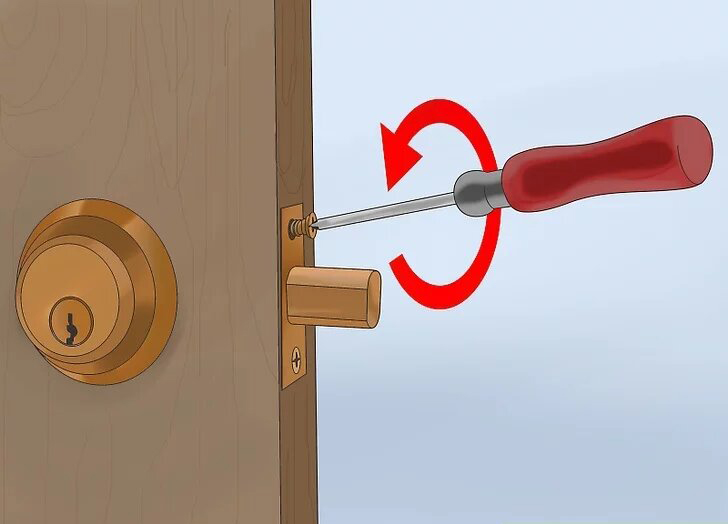
Remove the screws that hold the interior plate together. After removing the screws, you may either pull the internal faceplate straight out or rotate it counterclockwise. Then pull out or twist the outside plate to remove it.
- It’ll be difficult, but attempt to keep one hand on the external faceplate while removing the inside one. When you pull out the inside plate on some models, the external faceplate may not screw into place, and it can fall to the floor.
2 – Remove the set plate as well as the bolt.
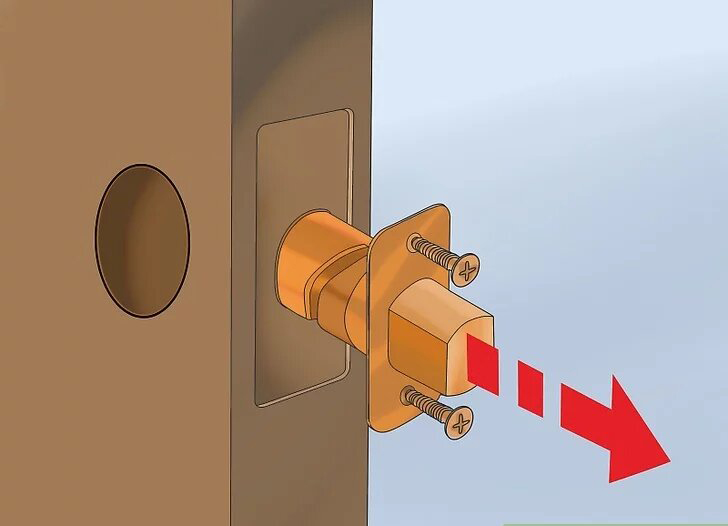
The lock’s final components are the set plate and bolt, which are screwed to the edge of the door. To finish uninstalling the old deadbolt, remove the screws, then pull out the set plate and bolt.
- The set plate and bolt are sometimes joined, but they are distinct components on some versions.
3 – Take the old deadbolt to a locksmith or rekey it.
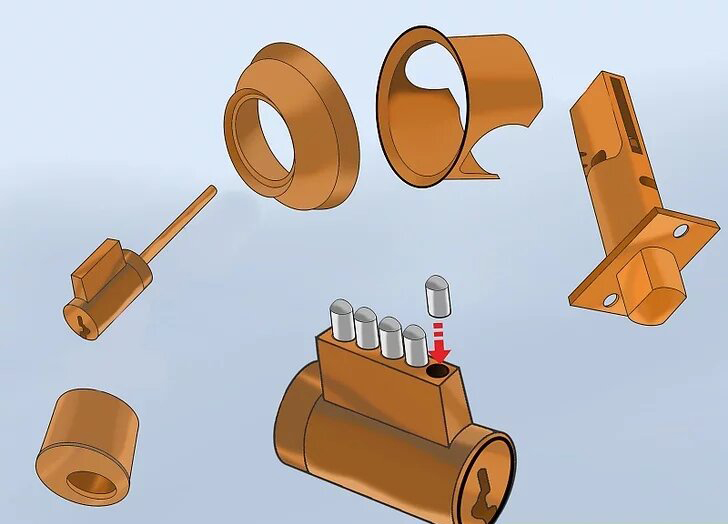
You can pop out the cylinder housing from the external faceplate and rekey it like a knob lock once you’ve removed the deadbolt. If you lose the key, you can have a new one created by taking the components to a locksmith.
- If the lock is worn or you simply want a new look, replace the complete deadbolt with a new one.
4 – Install the set plate and bolt on the new deadbolt.
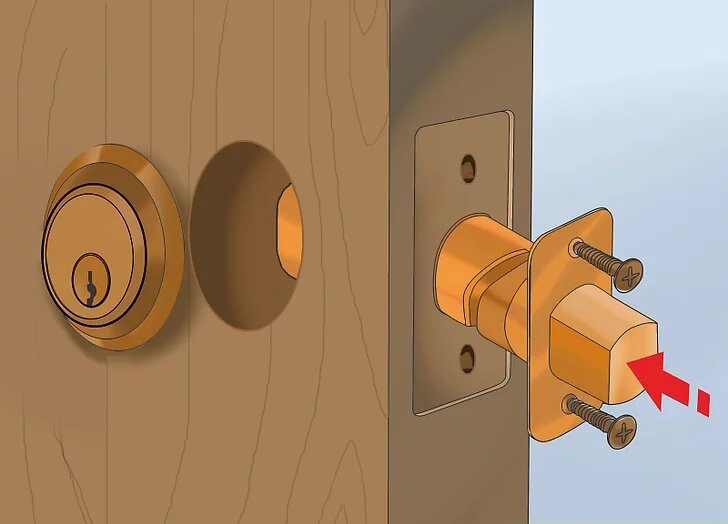
Start by inserting the bolt through the hole on the edge of the door where the old bolt used to fit if you’re replacing the entire lock. Place the new set plate over the indentation on the side of the door where the old plate fit if your brand’s plate and bolt are separate components.
- To secure the new lock, drive the new screws through the set plate and into the door.
- If your new lock didn’t come with screws, make sure to get some that match the colour of your hardware.
5 – The replacement faceplates should be screwed in place.
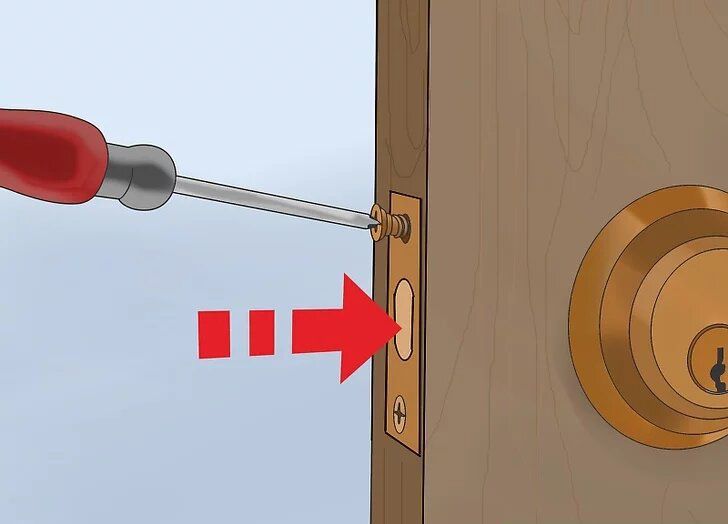
Place the new exterior and interior faceplates on the opposite sides of the door’s hole. Thread the new screws through the interior plate’s screw holes, the bolt’s screw holes, and the external plate’s screw holes. To finish the installation, tighten the screws until they’re completely tight.
Please follow us on Instagram.






Leave a Reply